
Introduction
We historically had made a change from Github Enterprise to Github Cloud. One of the downsides of this is that this would require external Github accounts that were not really within “control”, or included management of accounts. We needed to setup tracking of this information. We also needed a way to automate groups, which up until recently was not possible. However, the route we did go was able to be done in a self-service aspect (with a few limitations).
Create an Okta mastered attribute
So very similar to the blog post on pushing SSH keys from Okta to AD, we need to create an attribute to host Github Account information.
-
Select
ProfileunderUser (default)
-
Select
Add Attribute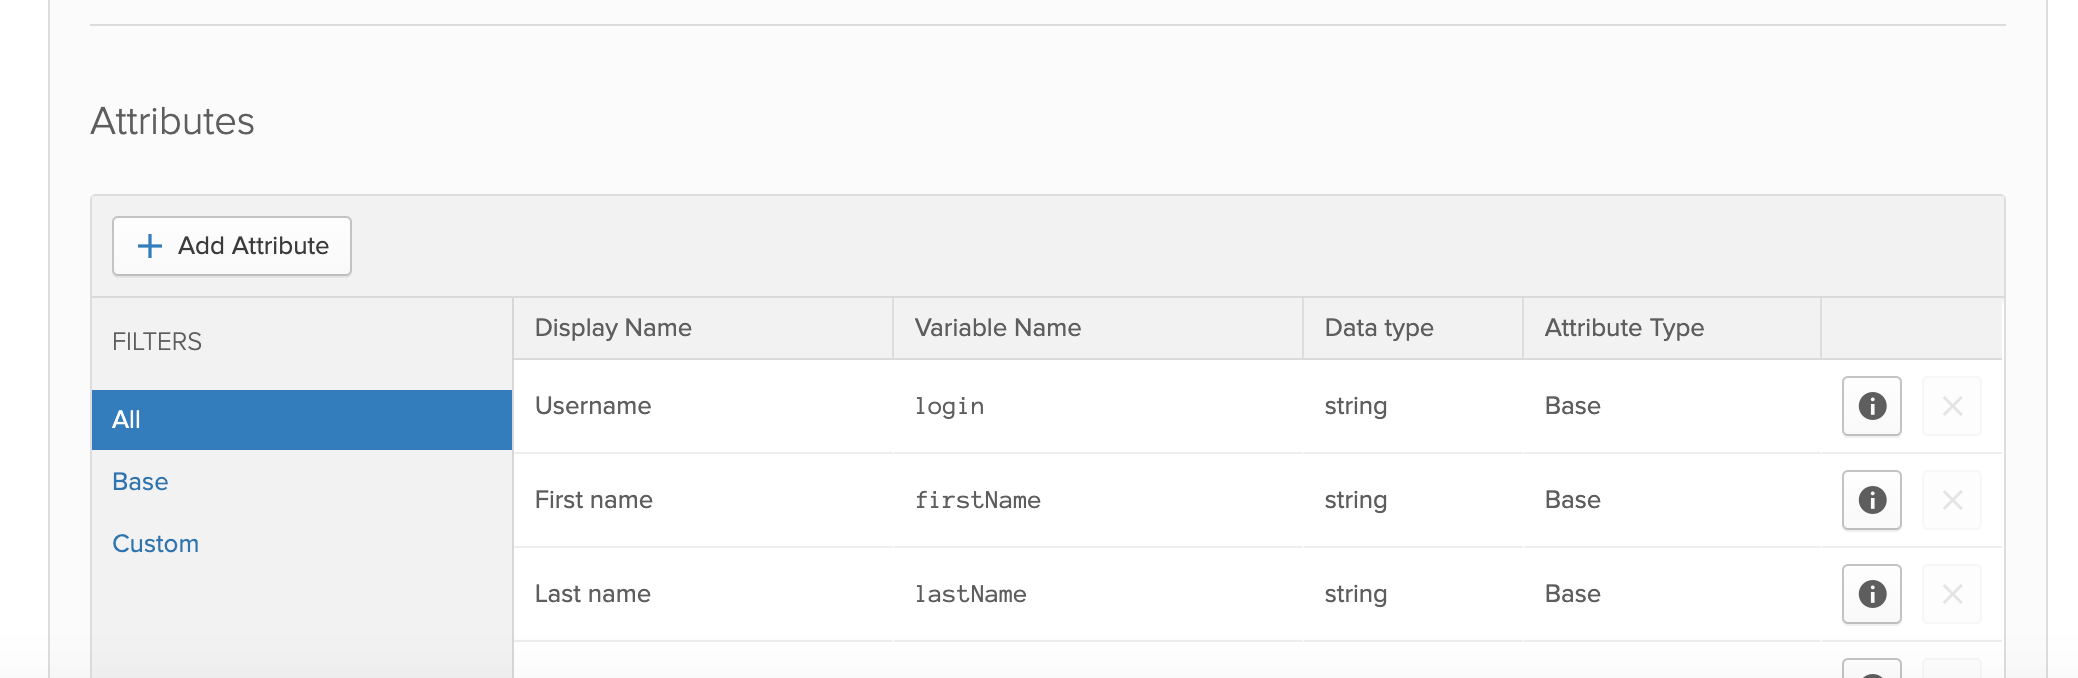
-
Once the
Add Attributewindow has appeared, fill out the prompts with the following options:- Display Name:
SSH Public Key - Variable Name:
com_github_accountnameorcom_github_username - Description: Add what you would like here, an example is below in the photograph
- Once done, select
Save
- Display Name:
-
Once the attribute is created, scroll down to the bottom, and find the newly created Okta attribute and click the pencil icon to edit the attribute.

-
You will want to change the attributes for
User PermissionandMaster Priorityto match to the picture below.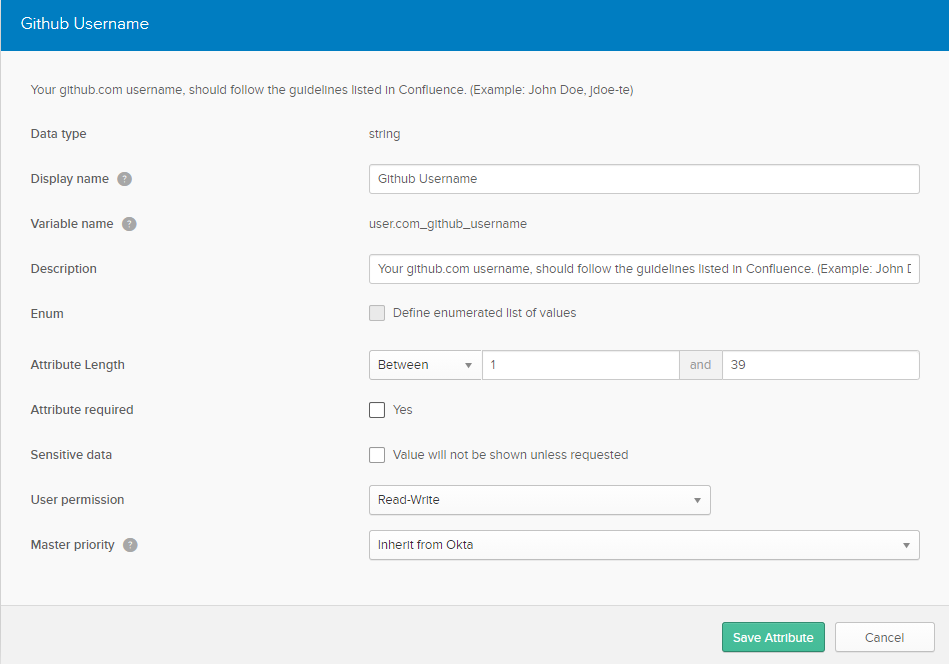
-
While optional, you may also want to change the
Attribute Lengthto1to39. Github has a maximum value of 39 characters, which can be seen here and here, and here (only when typing something more than 39 characters). This way there is validation of the account name length in place and someone doesn’t put the incorrect account in potentially.
Create Okta group & rule
Group
Create a group that will be assigned to the Okta application. My recommendation would be to call it iam_github or something to that extent, just to keep things very simple. You can go ahead and manually add a few people there for now, however, you ultimately do not want to manually assign users to this group, so that the group rule can take effect.
Group Rule
For a basic implementation of assigning the Okta application to the user. This is assuming that you do not have team groups configured/setup, and only have a single group assigned to the Github applications. If you want to also do validation (as in, you require a prefix, or suffix attached to the account), you can modify the expression language below to validate that an account matches those requirements before assigning the application.
- Okta Expression Language:
(user.com_github_username != null or user.com_github_username == "" ) - Okta Group: Your Github application group
Once created, mark it as active.
Assign the group to the application
Once the group & rule is finished being created, assign the group to the application.
So what happens now?
If an employee has not filled out the attribute in their Okta profile, they will not be assigned the application. When an employee does fill out the application, if you have added the syntax check (such as a suffix of prefix), it will assign the application assuming it meets any checks.
Once added to Github, without doing the previously mentioned assigning users to teams. Everything going forward would be self-service/self-requested when joining teams within the org. And from there, managers of each team can get approval notifications and add team members to the team once the SSO connection has been established.
You can further expand on this by creating multiple groups and checks within the rule, for instance, creating a group rule that checks against department attribute + okta username, to assign a different group and assign them the appropriate team with the URL above. However, you are still limited to five groups per team. So there needs to be careful consideration on how you apply those groups.
The other option is to do this using Okta workflows, this would do things directly against the API, and may not be limited to the five team limitation as described in the Github documentation.