
- Introduction
- Configuring SSSD on Linux to work with Active Directory
- Modifying the Active Directory Schema
- Creating an attribute in Okta’s User Directory Schema
- Adding an ssh key to Okta profile
- Add the new AD attribute to the Directories Profile in Okta
- Pushing Attributes from Okta to Application
Introduction
I really would love to implement Okta Advanced Sever Access (ASA) to our server infrastructure in our environment. ASA has three downsides:
- Expensive ($50,000 minimum) depending on the amount of servers being deployed to
- Requires extensive management approval
- Requires extensive security review from our team
Okta’s LDAP interface also does not support Linux/PAM officially, which appears to be (more or less) an artificial limit to push/advertise the ASA product.
So we need to find workarounds for this. This blog post covers details on how to do to 2 things:
- Expand the Active Directory schema to store and use SSH keys over LDAP.
- Allow for SSH Keys to be stored in Okta and pushed to Active Directory by the End User.
Configuring SSSD on Linux to work with Active Directory
We want to configure SSSD on Linux to hook up into Active Directory (a very basic configuration file, edit it to your needs):
|
|
I would suggest reading through Red Hat’s documentation for validating the configuration. I won’t go into SSSD more in-depth here.
Modifying the Active Directory Schema
We will need to modify the Active Directory schema to create an attribute called sshPublicKey.
Enable Schema Updates
- Open up an administrative command prompt session
- Open up an administrative registry editor session by running
regedit - Browse to
HKEY_LOCAL_MACHINE\SYSTEM\CurrentControlSet\Services\NTDS\Parameters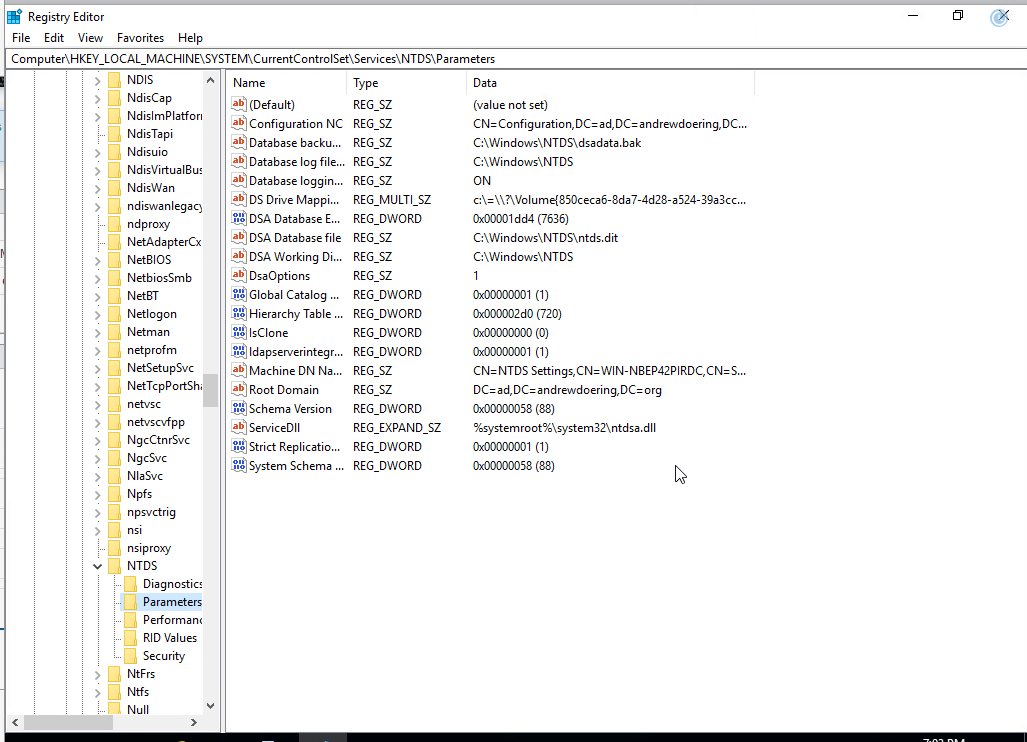
- Add a new DWORD key that is called
Schema Update Allowedwith a value of1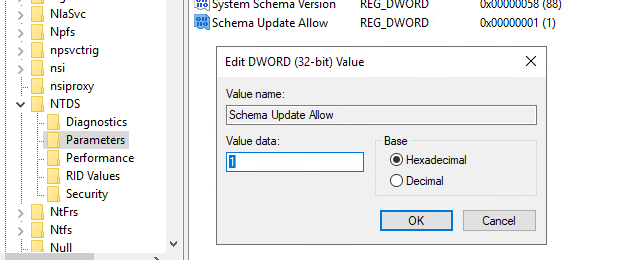
- In the administrative session of the command prompt, run
regsvr32 schmmgmt.dllto enable Schema Management MMC Plug-in and accept the prompt.
Adding the attribute in AD schema
I would highly recommend putting the project number/name in the description below, as well as what I have written.
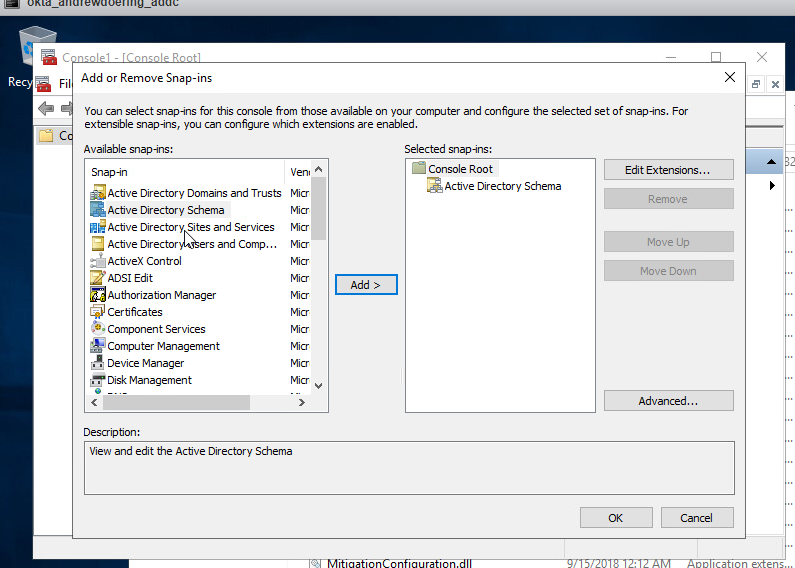
- Once the mmc window has been opened, add the schema module to the running mmc window.
- Expand the listing on the left hand side.
- Right Click on
Attributes, and then selectCreate New Attribute.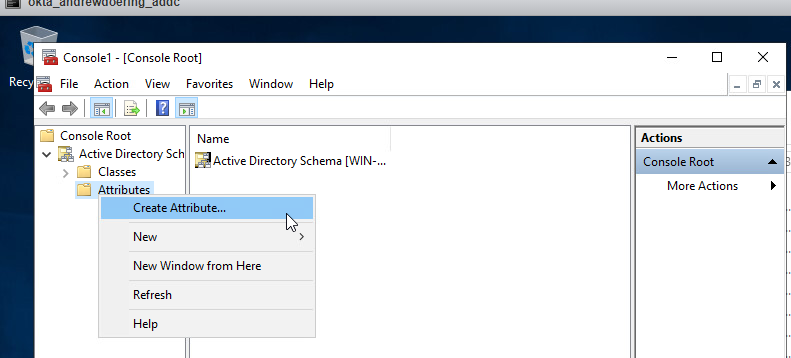
- Accept the warning that pops up and continue on.
- For
Common Name, entersshPublicKeysin the field. - For
LDAP Display Name, entersshPublicKeysin the field. - For
Description, enterFor Public SSH Key storage for sssd. - For
Unique X500 Object IDenter the following OID,1.3.6.1.4.1.24552.1.1.1.13. - For
Syntax, selectIA5-String. - Check the
Multi-Valuedbox. - Leave both
MinimumandMaximumblank.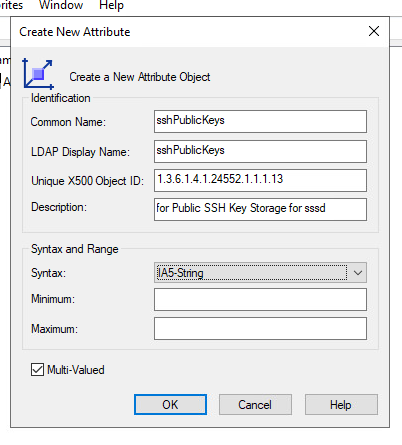
- Click
Ok.
Adding a new class for the attribute
Once we have added the attribute into Active Directory, we need to add a class for the attribute to be associated with it. I would highly recommend putting the project number/name in the description as well.
- Right-click on
Classes, then clickCreate class. - If presented, click
Continueon the warning. - For
Common Name, enterldapPublicKeyin the text field. - For
LDAP Display Name, enterldapPublicKeyin the text field. - For
Unique X500 Object ID, enter1.3.6.1.4.1.24552.500.1.1.2.0. - For
Description, enterFor use with sshPublicKeys attribute. - For
Parent Classentertop. - For
Class Type, selectAuxiliary.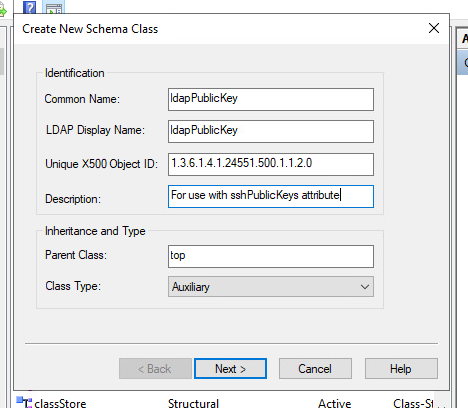
- Click
Next - Under
Optional, selectAdd, and scroll to findsshPublicKeys, clickOk.
- Click
Finishand leave the Schema MMC window open.
Associate the attribute and class to the user property
- With the schema window still open on
Classes, find theuserclass
- Right-click select on
properties.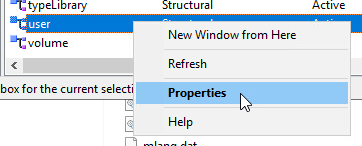
- Select the
Relationshiptab, and clickAdd Class...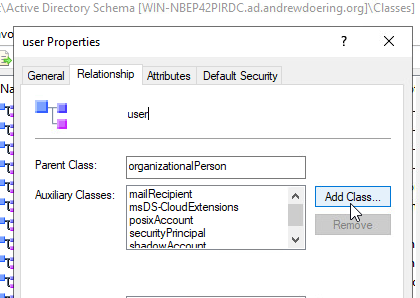
- Select
ldapPublicKeyand clickOk.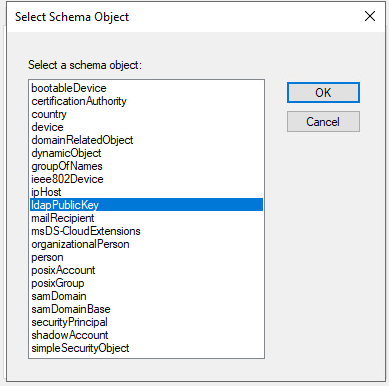
- Select the
Attributestab and clickAddunderOptional.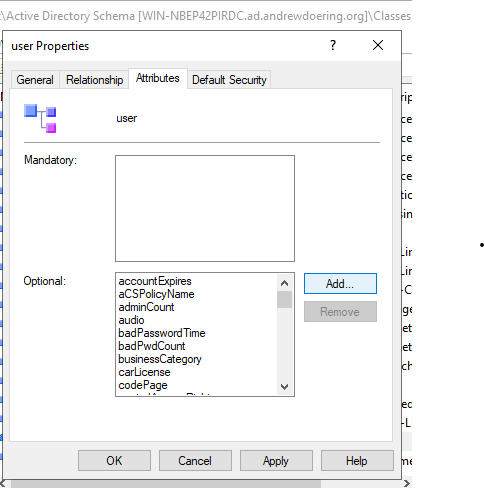
- Select
sshPublicKeyand clickOk.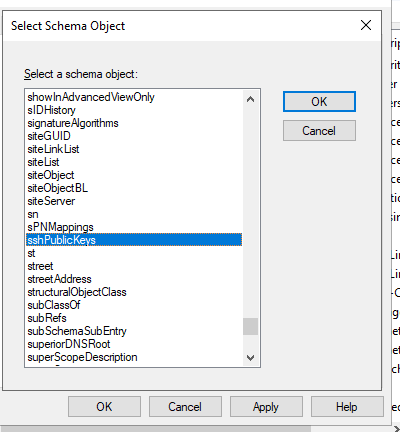
- Click
Applyand then clickOk - Proceed to close the MMC window.
Creating an attribute in Okta’s User Directory Schema
We will begin to create the attribute under Okta’s Universal Directory.
-
Select
ProfileunderUser (default)
-
Select
Add Attribute
-
Once the
Add Attributewindow has appeared, fill out the prompts with the following options: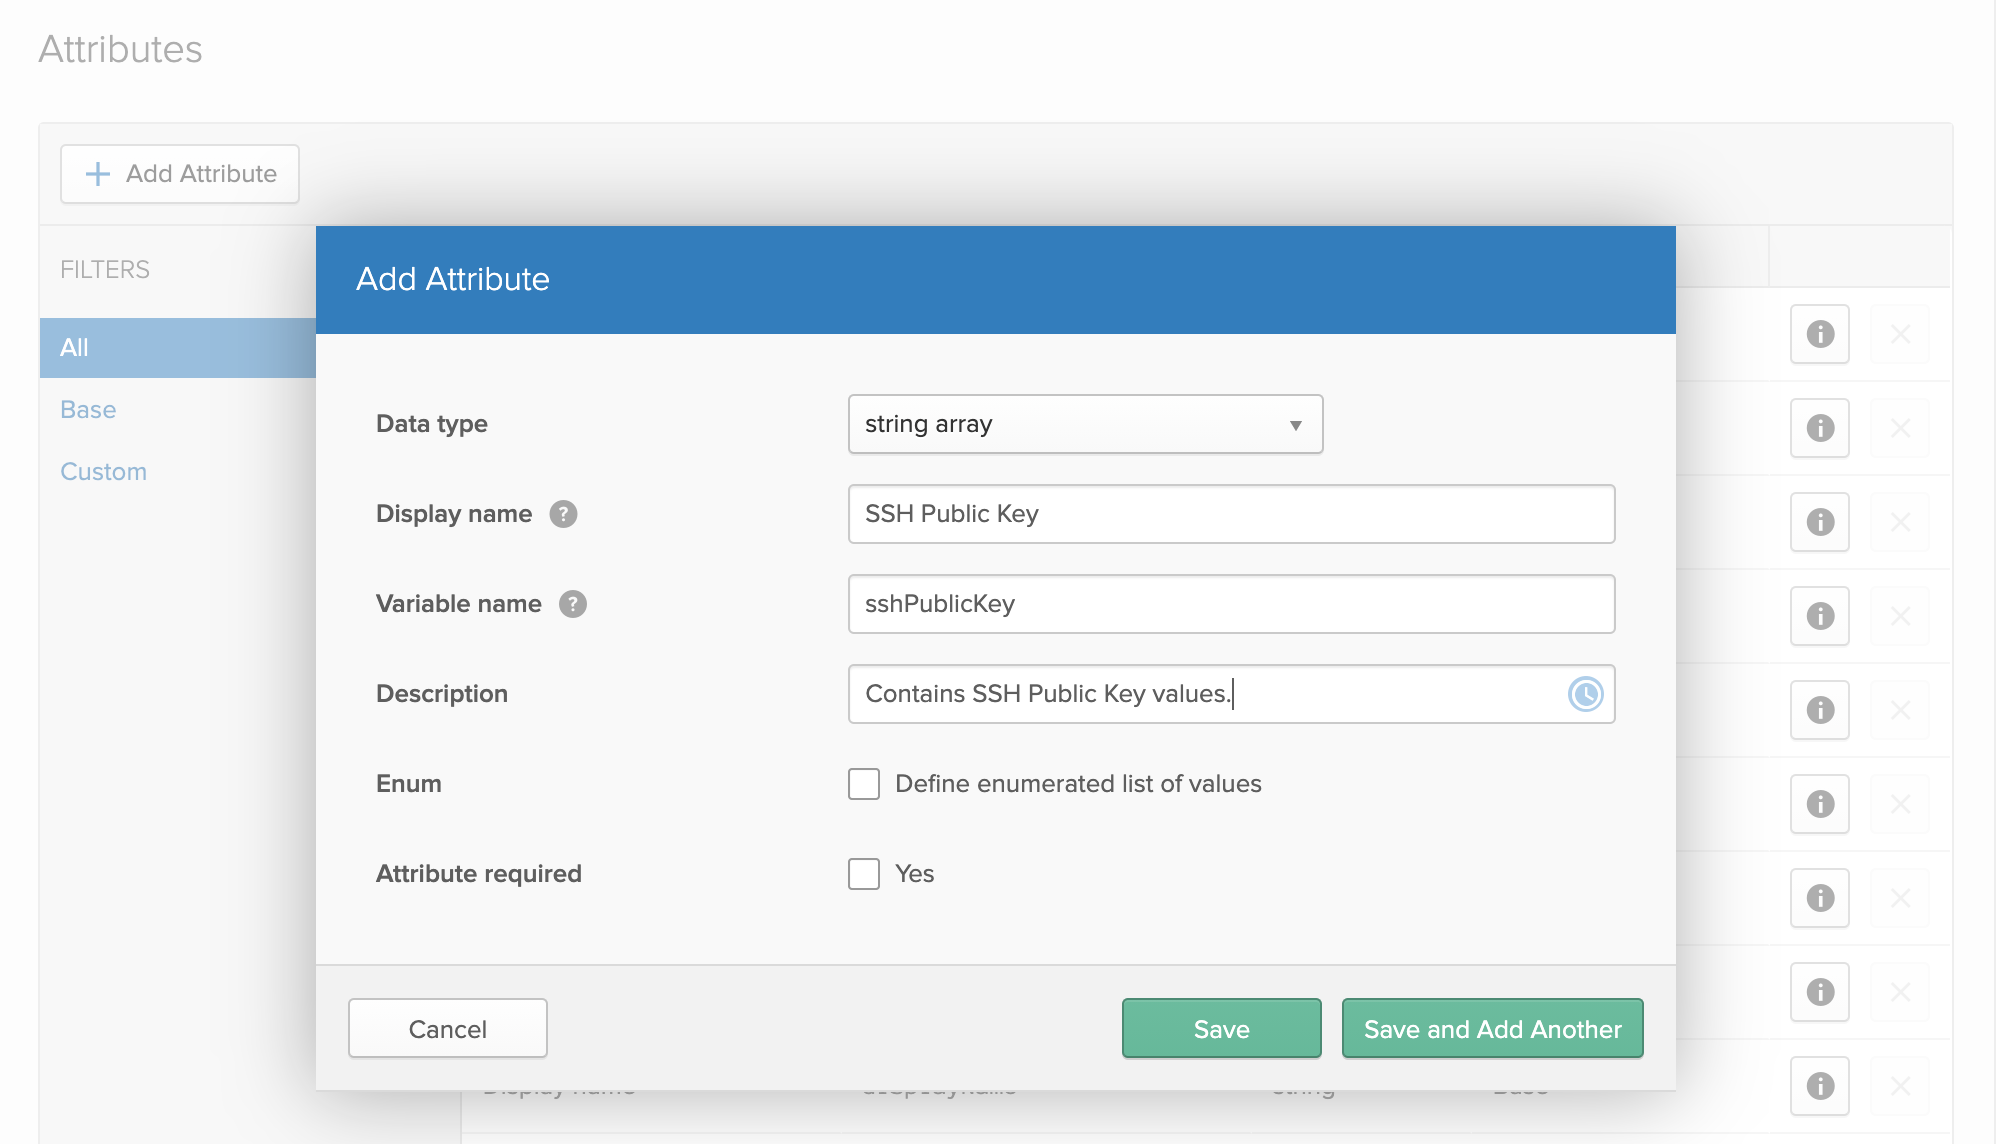
- Display Name:
SSH Public Key - Variable Name:
sshPublicKey - Description: Add what you would like here, an example is below in the photograph
- Once done, select
Save
- Display Name:
-
Once the attribute is created, scroll down to the bottom, and find the newly created Okta attribute and click the pencil icon to edit the attribute.

-
You will want to change the attributes to match to the picture below.
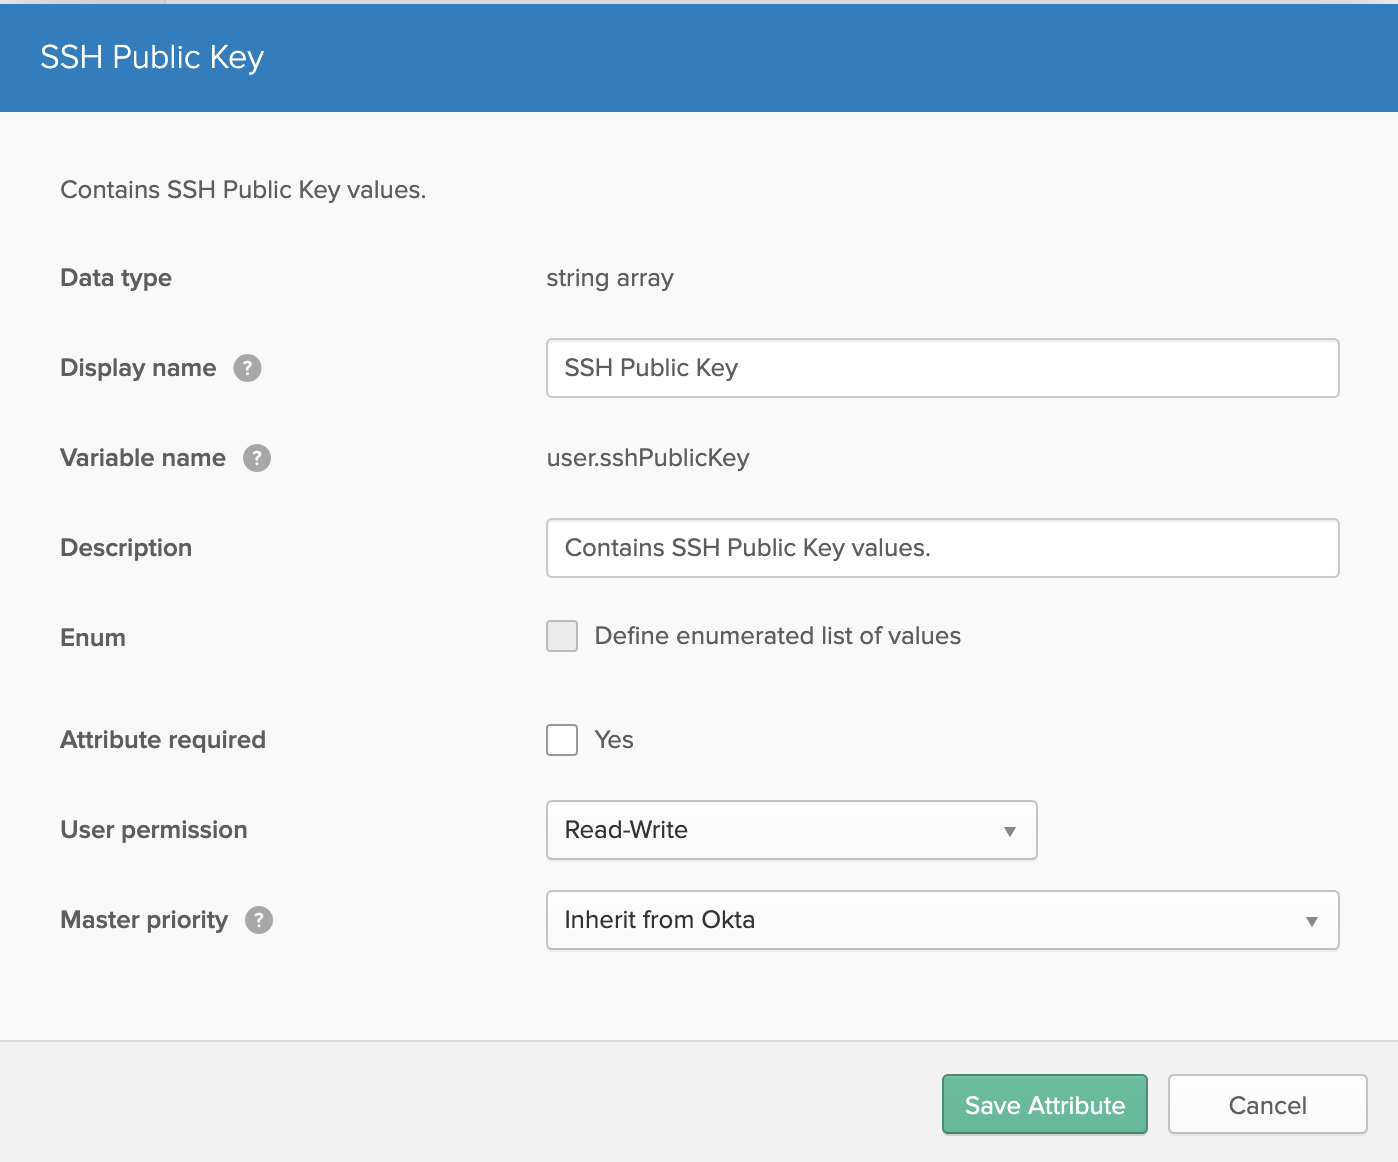
The reason for this is to allow user’s to modify the contents of the attribute value, and to not have a profile master potentially override or own the attribute contents.
Adding an ssh key to Okta profile
- Go to
https://yourdomain.okta.com/enduser/settings - Select
Edit Profile
- If prompted enter your pasword, if not proceed to the next step.
- Click
Edit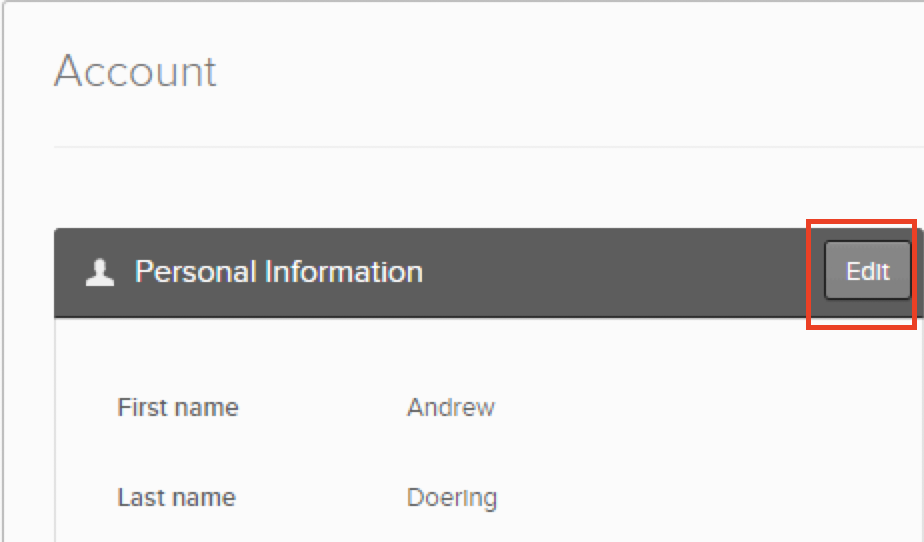
- Within the
[], add your SSH Key wrapped in". An example of this would be shown below.
|
|
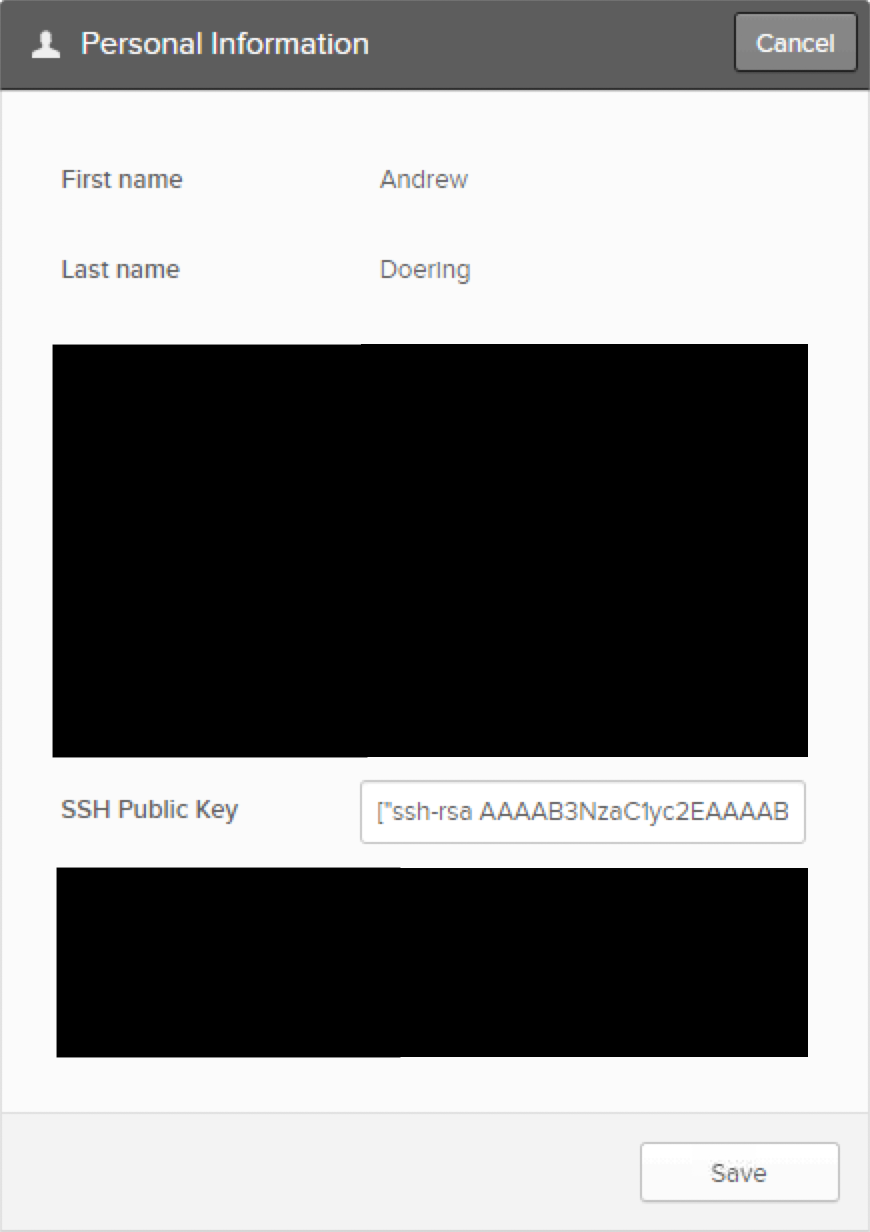 6. Select
 Save
From here, if you need to add new keys, simply put them in a comma delimited format. So multiple keys would look like ["key 1", "key 2", "key 3"].
Add the new AD attribute to the Directories Profile in Okta
One crucial step in allowing us to push the content down is to add the attribute from Active Directory so that Okta is aware of it.
- Go to
https://yourdomain.okta.com/admin/universaldirectoryand selectDirectories, then select your domain.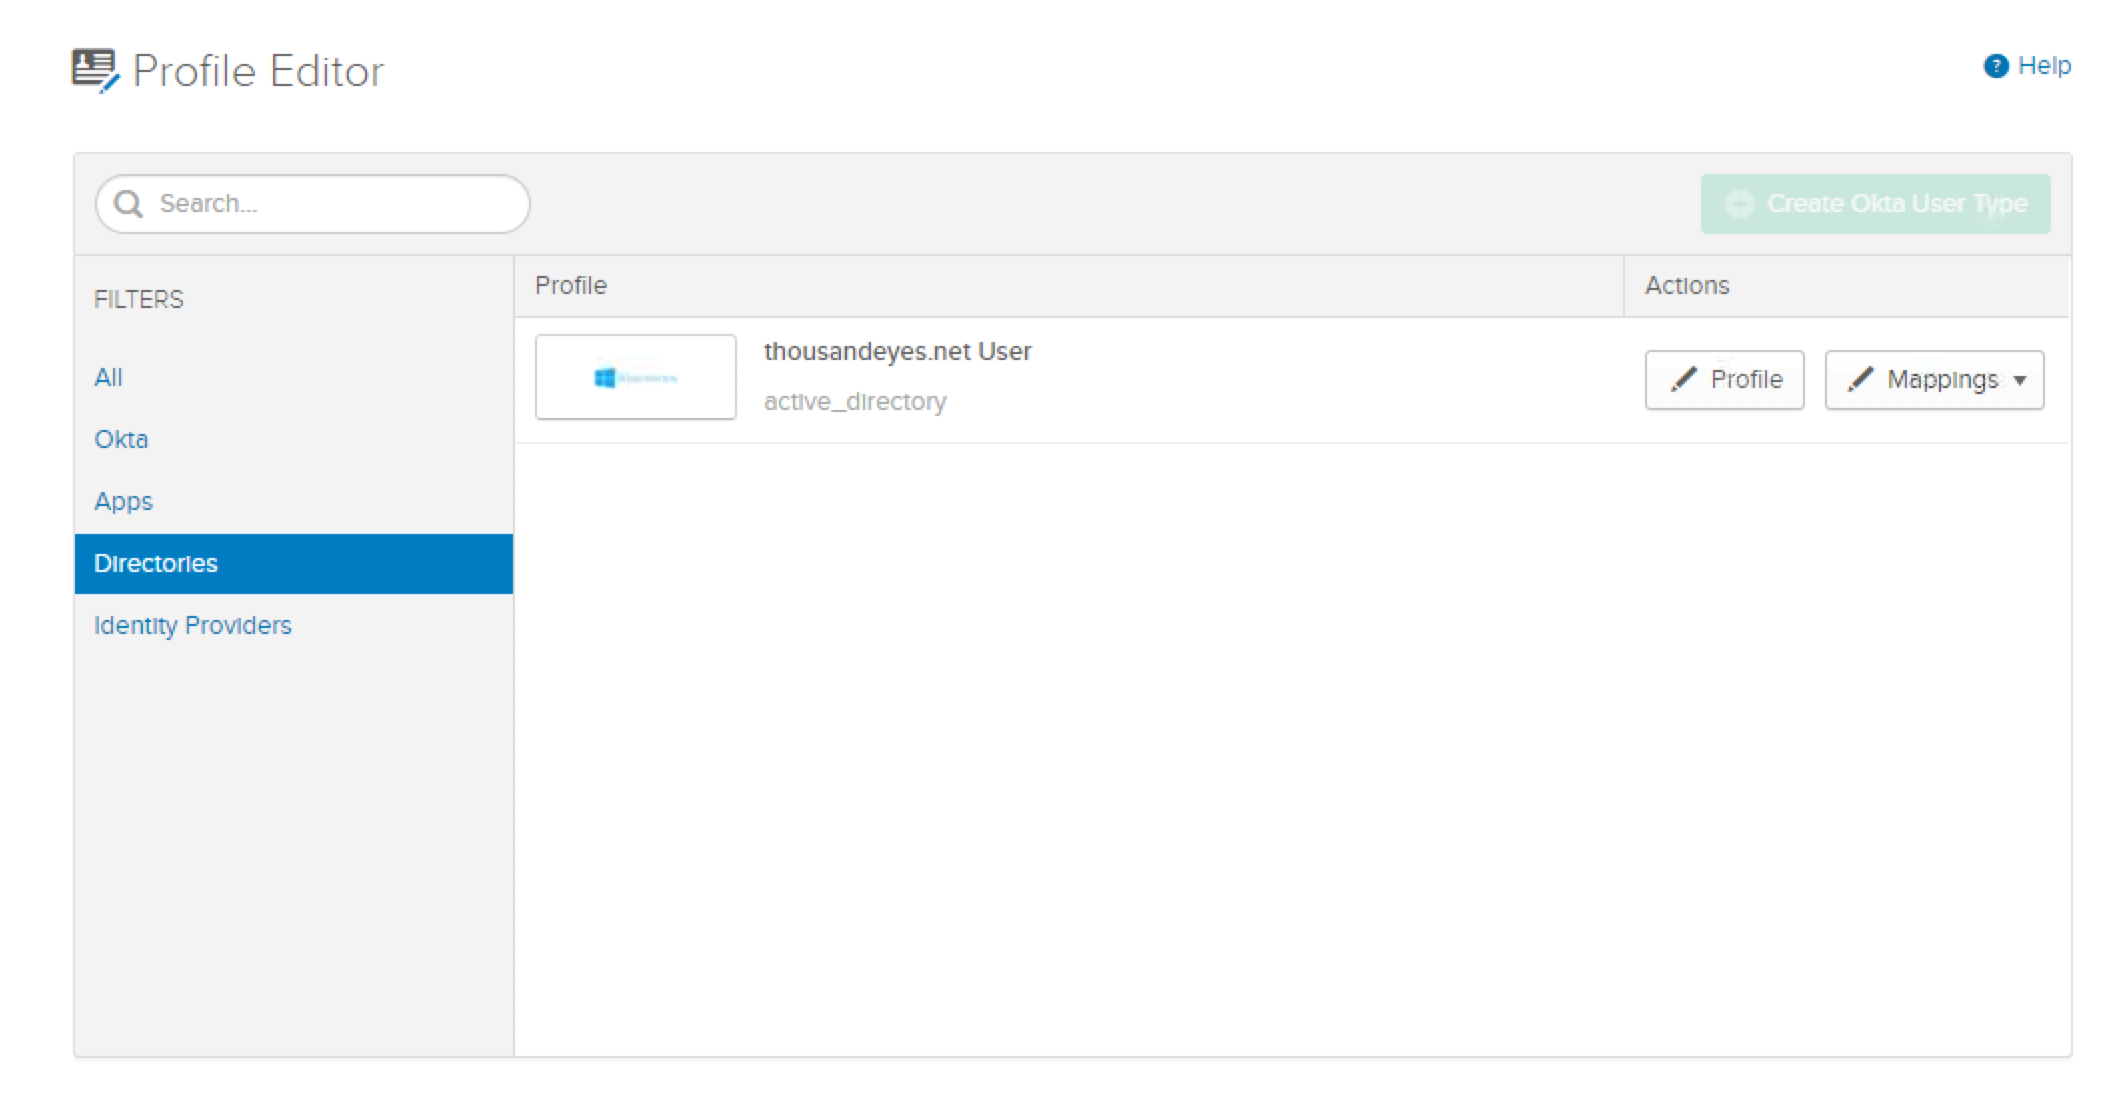
- Click
Profile, once the page finishes loading, selectAdd Attribute, and then search forsshPublicKey
- Click
Save
Pushing Attributes from Okta to Application
Before doing this, announce to your users will use a change. This could be a breaking change if SSH Keys are not saved into the user’s Okta profile. We will use Active Directory as the example application here, but this could be used in other ways.
- Go to
https://yourdomain.okta.com/admin/universaldirectoryand selectDirectories, then select your domain. - Click
Mappings, and then selectConfigure User Mappings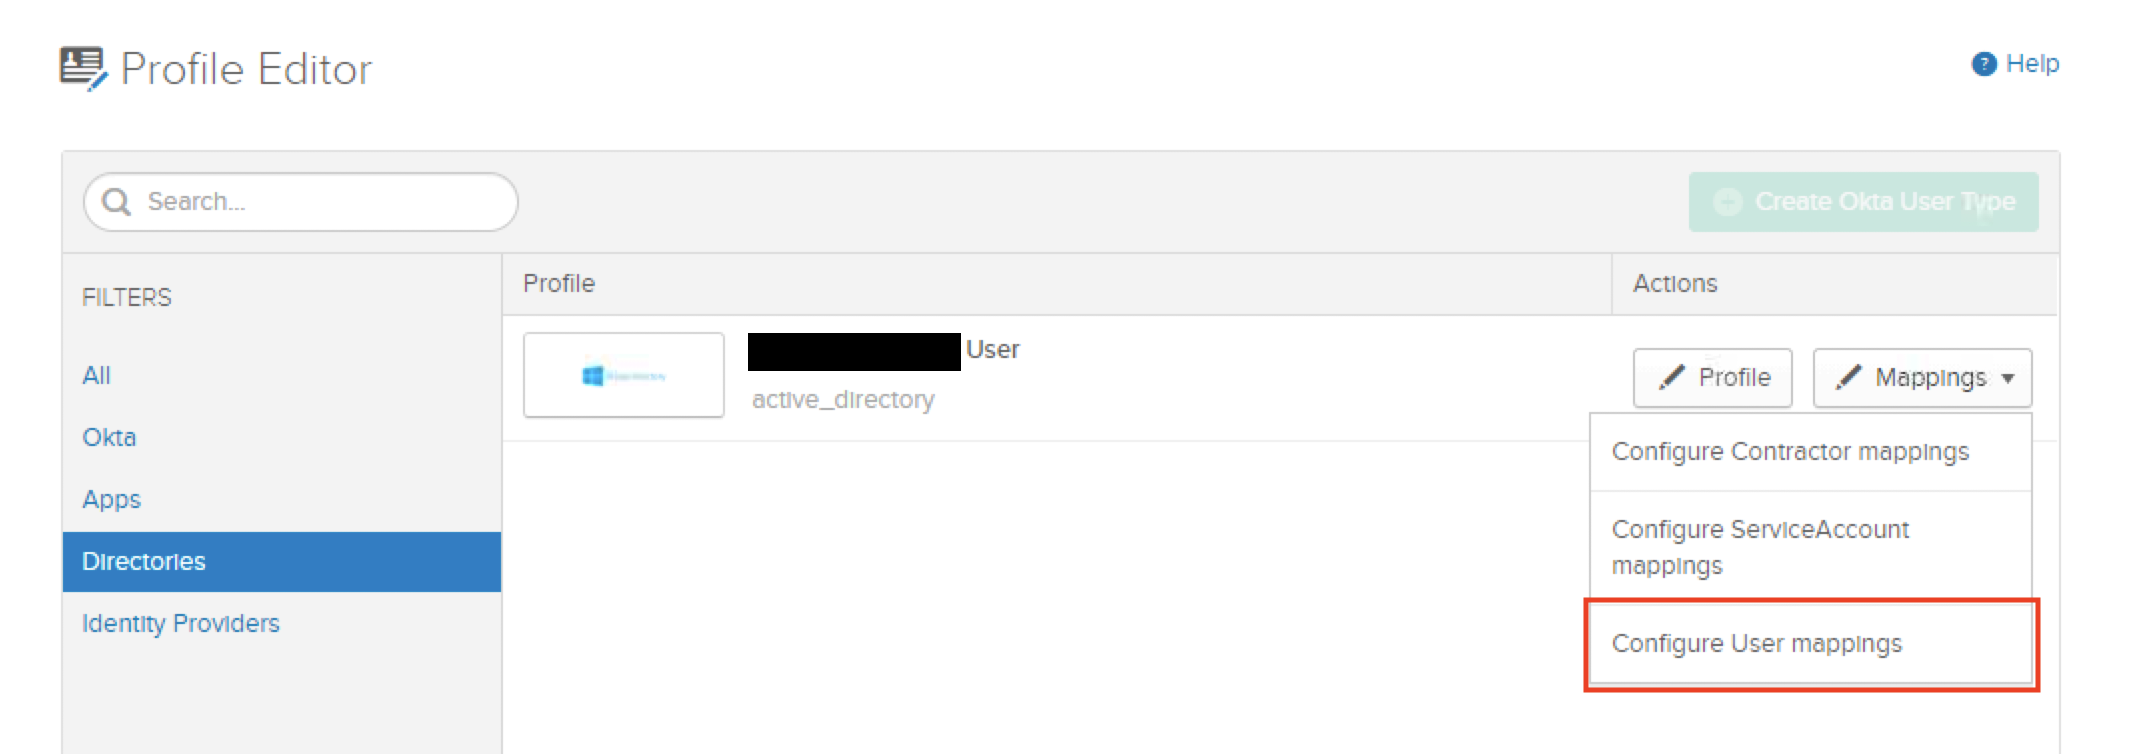
- Select the
Okta User to domain.com
- Scroll down to your
sshPublicKeyattribute on the right column and search forsshPublicKeyon the left column.
- Validate with a user that has saved SSH Keys to their Okta profile, before clicking save. Once validated, select
Save mapping.
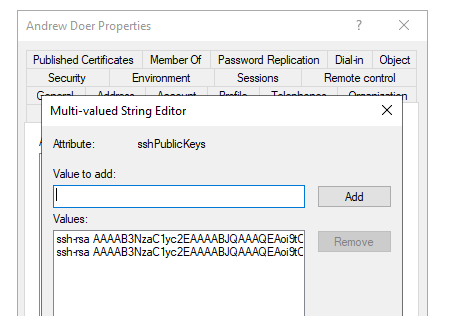
From here, your user’s SSH keys should be in a multi value format pushed down to Active Directory. Note, there are two values here, as I added the SSH key twice to the Okta profile to show the multi-valued aspect.
From here, you could use tools like Ansible, SSSD, and others, to pull the content/value out of Active Directory for use with other services and systems. This could also be done directly to the LDAP Interface on Okta, however, that is not officially supported.